We know eating out is expensive, plus when you make the food at home you can control what good, wholesome ingredients go into it. So, what are you waiting for? Let's start cooking!!!

Tuesday, March 24, 2009

Oven-Fried Chicken

I made this for dinner tonight and the extra effort took to make this recipe was worth it. This was delicious, juicy, well done through and through, crispy, and just what fried chicken should be and it's great for a crowd or just a nice family meal.


"Oven-Fried Chicken"

INGREDIENTS:
2 chickens (3 pounds each), cut in 8 serving pieces
1 quart buttermilk
2 cups all-purpose flour
1 tablespoon kosher salt
1/2 tsp paprika
1 tablespoon freshly ground black pepper
Vegetable oil or vegetable shortening

COOKING INSTRUCTIONS:
1) Place the chicken pieces in a large bowl and pour the buttermilk over them. Cover with plastic wrap and refrigerate overnight.

2) Preheat the oven to 350 degrees F.

3) Combine the flour, paprika, salt, and pepper in a large bowl. Take the chicken out of the buttermilk and coat each piece thoroughly with the flour mixture. Pour the oil into a large heavy-bottomed stockpot to a depth of 1-inch and heat to 360 degrees F on a thermometer.

4) Working in batches, carefully place several pieces of chicken in the oil and fry for about 3 minutes on each side until the coating is a light golden brown (it will continue to brown in the oven). Don't crowd the pieces. Remove the chicken from the oil and place each piece on a metal baking rack set on a sheet pan. Allow the oil to return to 360 degrees F before frying the next batch. When all the chicken is fried, bake for 30 to 40 minutes, until the chicken is no longer pink inside. Serve hot.

Monday, March 23, 2009

Sauted Green Beans with Ground Beef

This recipe is one of my hubby's favorite...a decent homemade meal that we had for dinner. Originally, in the Philippines we usually use "sitaw" or string beans instead of green beans, but you know it's kinda hard to find that kind of vegetable here in the States. So, green beans is the great subtitutes for that. Adding 2 tbsp of banana kechup with tomato sauce is my way too.


"Sauted Green Beans with Ground Beef"

INGREDIENTS:
1 lb ground beef
1-1 1/2 lbs green beans
3 cloves garlic, crushed
1 medium chopped onion
2 tbsp vegetable oil
1 tbsp soy sauce
1 can of 8 oz Tomato Sauce
1/4 c water if needed
salt and pepper to taste


COOKING INSTRUCTIONS:
1. Saute garlic and onion in hot vegetable oil as usual.
2. Add the pork and stir until slightly brown
3. Add the green beans and keep stirring until coated with oil.
4. Add the tomato sauce, soy sauce, salt and pepper.
5. Add 1/4 cup water if it dries up to prevent burning
6. Simmer for 10-15 minutes until green beans are tender but still crisp
7. Serve with hot steamed rice.

Sunday, March 22, 2009

Champorado


Champorado (Tagalog: tsamporado) is a sweet chocolate rice porridge in Filipino cuisine. It is traditionally made by boiling sticky/sweet rice and cocoa powder giving it a distinctly brown color. However, dry champorado mixes, which may be found in some Asian food stores, are prepared by adding just boiling water. It can be served hot or cold and with milk and sugar to taste. It is served usually at breakfast and sometimes together with dried fish locally known as tuyo.

The pudding becomes very thick and the lighter milk helps to "loosen" it. It's almost like eating "chocolate oatmeal." It can be eaten as a snack or dessert as well. Sweet rice can be found in most Asian aisles of a grocery store.

This is a favorite Filipino recipe. I remember my Nanay used to make this for us all the time growing up.

"CHAMPORADO"

INGREDIENTS:

1 cup glutinous (sweet/sticky) rice
2 1/2 to 4 cups water (it depends how thick the soup you want)
1/2 cup unsweetened cocoa
1/2 cup granulated sugar
sweetened condensed milk

COOKING INSTRUCTIONS:
1) Cook Rice in a medium-size saucepan with water.

2) Stir constantly.

3) When rice is ready, rice should be somewhat transparent and it'll feel thicker as you stir.

4) add cocoa and sugar except milk.

5) Serve in bowls with swirls of milk on top.

Thursday, March 12, 2009

My Best Cheesecake

Now we know the history of cheesecake, let's make this simple recipe of mine.
OK, I'm not gonna lie, my husband and daughter just love this creamy and delicious cheesecake:)


What You Need


1-3/4 cups HONEY MAID Graham Cracker Crumbs
1/3 cup margarine or butter, melted
1 cups sugar, divided
3 pkg. (8 oz. each) PHILADELPHIA Cream Cheese, softened
1 cup BREAKSTONE'S or KNUDSEN Sour Cream
2 tsp. vanilla
3 eggs
1 can (21 oz.) cherry pie filling or any filling you want


BAKING INSTRUCTIONS:


PREHEAT oven to 325F if using a silver 8- or 9-inch springform pan. Mix graham cracker crumbs, margarine and 1/4 cup of the sugar. Press firmly onto bottom and 2-1/2 inches up side of pan; set aside.

BEAT cream cheese and the remaining 1 cup sugar in large bowl with electric mixer on medium speed until well blended. Add sour cream and vanilla; mix well. Add eggs, one at a time, beating on low speed after each addition just until blended. Pour into crust.

BAKE 45 to 50 mins. or until the center is almost set. Turn your oven off and leave the cheesecake inside the for another hour. Remove cheesecake from oven; cool completely. Refrigerate at least 6 hours or overnight. Loosen cheesecake from rim of pan; remove rim. Top cheesecake with pie filling just before serving. Store leftover cheesecake in refrigerator.


Prep Time: 15 min Total Time: 5 hr 25 min Makes: 16 servings, one slice each


CHEESECAKE TIPS AND IDEAS


1) A springform pan (with removable side and bottom) is the most commonly used pan for making cheesecakes.

2) Avoid over-beating the batter. Over-beating incorporates additional air and tends to cause cracking on the surface of the cheesecake.

3) For even marbling and the best distribution of added ingredients, such as chocolate chips or nuts, do not over-soften or over-beat the cream cheese.

4) Avoid over-baking: Cheesecake baking times are not always exact, due to variations in ovens. The cheesecake will continue to bake after it is removed from the oven. The center of the cheesecake should be just slightly moist when it is ready to be removed.

5) Upon removal from the oven, loosen the cake from the edge of the pan by running the tip of a knife or narrow spatula between the top edge of the cake and the side of the pan. This allows the cake to pull away freely from the pan as it cools.

6) Cool the cheesecake on a wire rack away from drafts.

7) After a cheesecake has cooled completely, gently loosen the entire side of the cheesecake from the pan with the tip of a knife while slowly releasing the springform pan clamp. Carefully remove the side of the pan.

8) Baked cheesecakes freeze well. Cool them completely and wrap them securely in heavy-duty foil or plastic wrap, but do not freeze cheesecakes with garnishes or toppings.

The History of Cheesecake

Cheesecake is believed to have originated in ancient Greece. Historians believe that cheesecake was served to the athletes during the first Olympic Games held in 776 B.C. However, cheese making can be traced back as far as 2,000 B.C., anthropologists have found cheese molds dating back to that period. Alan Davidson, author of the Oxford Companion to Food, wrote that, "cheesecake was mentioned in Marcus Porcius Cato's De re Rustica around 200 BCE and that Cato described making his cheese libum (cake) with results very similar to modern cheesecake."
The Romans spread cheesecake from Greece to across Europe. Centuries later cheesecake appeared in America, the recipes brought over by immigrants.

Wednesday, March 11, 2009

Good Tasting Coffee

Steps to brewing great coffee


1.Use good quality coffee, freshly roasted and freshly ground
2.Use fresh, clean, cold water. Filtered or bottled water works well, but avoid 33distilled or softened water.
3.The grind chosen must be of the correct fineness for the chosen brewing method.
4.The post must be cleand and warm
5.Make only enough coffee for your immediate needs. The coffee will deteriorate if you keep it too long. Avoid reheating coffee, it just doesn't taste the same.
6.Avoid boiling brewed coffee - it is a sure way to spoil the coffee.
7.Use approximately 70 grams of coffee per litre of water.


400/270 Pictures, Images and Photos

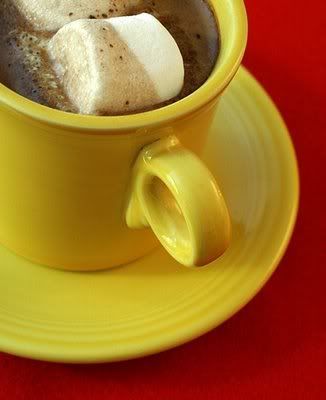
Hot Cocoa to warm you up!!!

Hot Cocoa


Ingredients:
1/2 cup sugar
1/4 cup HERSHEY'S Cocoa
Dash salt
1/3 cup hot water
4 cups (1 qt.) milk
3/4 teaspoon vanilla extract
Miniature marshmallows or sweetened whipped cream(optional)


Directions:
1. Stir together sugar, cocoa and salt in medium saucepan; stir in water. Cook over medium heat, stirring constantly, until mixture comes to a boil. Boil and stir 2 minutes. Add milk; stirring constantly, heat to serving temperature. Do Not Boil.


2. Remove from heat; add vanilla. Beat with rotary beater or whisk until foamy. Serve topped with marshmallows or whipped cream, if desired. Five 8-oz. servings.


3. Enjoy!

Hot Cocoa Pictures, Images and Photos

Great Canadian Butter Tart


I got this recipe from the Pie Lady Bakery in Canada couple years ago and
I really enjoyed cooking my Canadian Butter Tart recipe it was so much fun.
With my easy recipe you too can make this wonderful treat.

I always made my own crust or tart shells.

(makes lots to freeze 3-4 dozens)

INGREDIENTS:
1 lb. butter, softened
4 cups brown sugar
2 tsp. vanilla extract
1 tsp.salt
4 cups corn syrup
12 eggs
raisins or any nuts you want
4 dozen pastry tart shells

BAKING INSTRUCTIONS:
Combine butter and sugar. Add extract, salt and 2 eggs at a time untill smooth. Add corn syrup and mix well. Scrape the bottom. Put 10 raisins or nuts in bottom of regular size pastry tart shells. Fill tart shells 3/4 full. Bake at 350 deg for 20-25 minutes. Cool before removing from pans. Enjoy:)Photobucket


How To Learn to Love Cooking

By Mark Stibich, Ph.D., About.com

Many people regard cooking as a chore. Likewise, many people who are motivated to improve their eating habits fail because they are either afraid to cook or have decided that they “hate” to cook. It is very difficult to get control over what we eat if we rely on food that is already prepared for us, whether from the frozen foods aisle at the grocery store or from fast food restaurants. Use these simple tips to take the mystery and drudgery out of cooking:

Difficulty: Easy
Time Required: varies

Smiley Cooking Chores Pictures, Images and Photos

Here's How:
1. Start Simply
If you are new to cooking or have limited time, do not begin your cooking experiments with complicated dishes or with recipes that include ingredients that you are unfamiliar with. Follow these simple suggestions:

-Choose a simple soup or stir-fry recipe, broil a piece of fish or some scallops, or prepare a colorful salad.
-Prepare all of your ingredients before you start to cook so that you don’t get flustered (which is why cooking always looks so fun and easy on cooking shows).
-Read the recipe a couple of times before you begin, so that there are no unexpected steps in the middle of your recipe.

2. Learn Some Techniques
Take a simple class on knife skills. Ask the butcher the best way to prepare the cut of meat that you buy. Get a book that shows you diagrams of preparing different vegetables. Remember, every cook had to learn these things at some point.

3. Cook What You Like
You will have more fun cooking if you are looking forward to eating the finished product. Even if your main goal is to cook in a way that is healthy, there are excellent recipes that use spices and interesting combinations of flavors to make things taste good without fats or sugars (or any other ingredient that you are trying to avoid).

4. Plan Your Meals
Before you head to the grocery store, sit down and figure out a couple of meals:

-Look up the recipes, and write down the list of ingredients that you need.
-Know when you will eat each meal, based on when you have the time to prepare them (for instance, more complicated dishes can be served on the weekends, with more simple food or leftovers served on weekday evenings).
-Try to plan at least three days at a time.

5. Start with Quality Ingredients
It is very important that all of your ingredients be fresh and of high quality. Not only will they taste better, but fresh food contains more vitamins. If all of your ingredients taste good on their own, it is hard to have a recipe that is a failure.

6. Enjoy Each Step
Try to change your thinking about each part of the food preparation process and enjoy each step along the way:

-Go to the grocery store when it is not crowded and enjoy the achievement of getting all of the items on your list.
-When you chop your vegetables for cooking, take your time and notice the different textures and colors.
-Take special interest in the spices that you add and how each one changes the flavors of your dishes.
-Pretty soon you will be inspired to improvise by adding your own touches to recipes

7. Don’t Forget Presentation
After putting effort into shopping, washing and preparing ingredients, and cooking the meal, don’t just dump the food onto the plate:

-Take a couple of seconds to arrange the food on the plate.
-Add a lemon wedge or some freshly-ground pepper.
-Even if you are eating by yourself, make your food attractive.

8. Be Proud of Yourself
You did it. You made the food that you are about to eat. You can take comfort in the fact that you know what is in this food that is about to nourish your body. After a couple of successful meals, you may find yourself “addicted” to cooking and excited to plan your next adventure in the kitchen.

bon appetit Pictures, Images and Photos

What is a Dieting?

Dieting is an act of self-control and avoidance of fatty food, low cholesterol food, less oily food, so as to maintain the fat-to-muscle ratio. Eating more raw vegetables and less oil-rich food increases the body metabolism and ultimately increases the life expectancy. Dieting should be done from early age accompanied with a regular exercise routine.

Eat Healthy - Stay Fit!!!

What is cuisine?

The traditional cooking methods and food preparation of cultures, religions and regions is known as cuisine. The ingredients, equipment and skill available may influence a cuisine. A cuisine includes not only the food of a culture, but also the beverages. New cuisines evolve over time.

Advances in food production, food preservation and the transport of food have now allowed cuisines to be experienced around the world and not just in their place of origin. The traditional cuisines of France, Italy, India and Japan are particularly popular around the world. Western influences such as fast food threaten the future of some traditional cuisines around the world and the Slow Food movement has been established to promote and preserve these cuisines.

What is entertaining?

Entertaining is inviting and providing hospitality to guests for informal parties and special functions, often for the purpose of talking, eating and drinking. The presentation of one’s house and the food served are both important aspects of consideration when entertaining.

What is cooking?

For some, the basic recipe will help to hold over hunger and is the best that can be done. For others, food is more than just a meal, it’s an art form. Something that is to be enjoyed - Jim Catanich.

The act of preparing food for human consumption is known as cooking. The cooking process involves using a variety of methods and tools to prepare a set of ingredients so that they are digestible and have flavour. The process uses a form of scientific method and so the quantities of different ingredients and the conditions in which the food is prepared influence the resulting product. Heat is often applied to food during the process.

Cooking covers both the necessity to eat and the desire for variety in what is eaten. A combination of taste, sight and nutrition requirements come together in subtle ways to make each meal different. Each culture has developed its own methods and techniques for preparing their food, creating unique and rich recipes that have now been shared throughout the world. However, the obsession with the art of cooking is one thing all cultures share.